|
Setting the Stage Start
Overview Modeling Molecules Animating the Reaction Setting the Stage Making Glass Mixing Chemicals Animating the Camera Animating Precipitation Putting It All Together 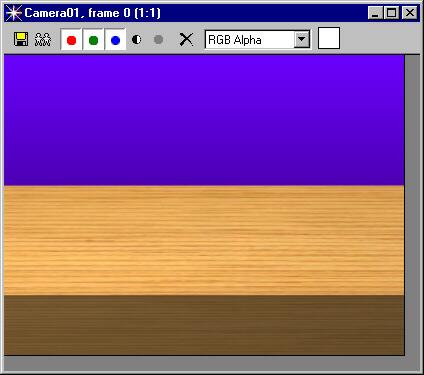
|
|
Setting the Stage Start
Overview Modeling Molecules Animating the Reaction Setting the Stage Making Glass Mixing Chemicals Animating the Camera Animating Precipitation Putting It All Together
|
|
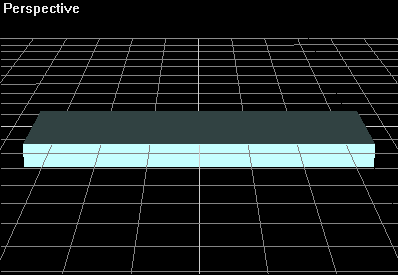
In this lesson, you will create the stage and the background for your animation of chemicals pouring. But before you begin, you need to set up a folder in which you will save a series of 3D Studio MAX scenes, and their rendered output -- still images and animation files. Setting Up Storage Create a folder on your hard drive that has plenty of room -- 100 MB or more. Name the new folder "Chemistry." Open 3D Studio MAX 3. If you already have the program running, choose File > Reset. Save the scene to the Chemistry folder and name it Stage.max. Creating the Stage In the Perspecive viewport, create a box for your table. Set Length = 270, Width = 720, Height = - 50.
Zoom in closely so that the box looks fills the bottom half of the perspective view:
Click the
Lights and Cameras tab and click
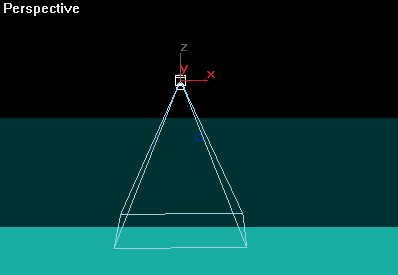
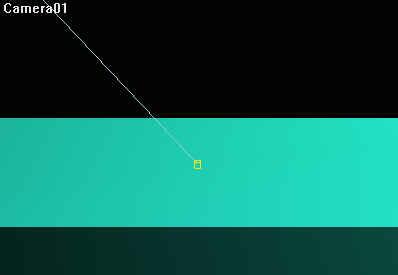
With the perspective view still activated, and the camera still selected, type Ctrl+C to match the camera to the view. Then type C to see the view from the camera:
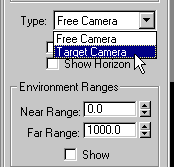
Finally, in the Modify panel, convert the free camera to a target camera:
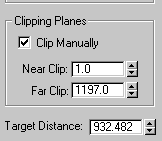
In the Clipping Planes group, enable (i.e. check) Clip Manually. The clipping planes appear in the viewports in red. Adjust the far clip setting so that the far clip plane falls beyond the back edge of the table so that the table is completely visible:
Also,
make sure that the camera target is located at (0,0,0) (the origin).
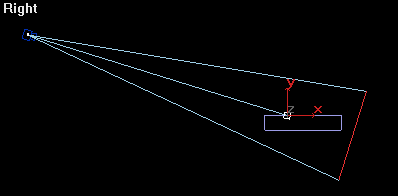
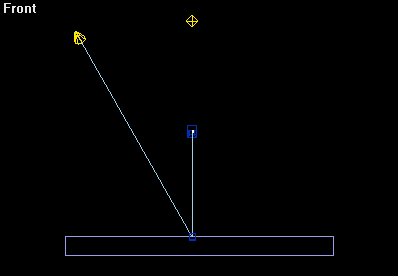
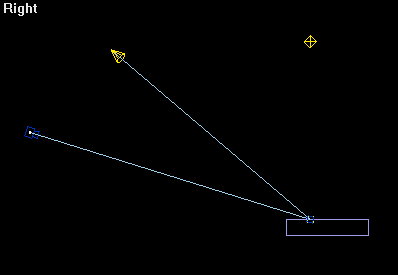
Next, create a spotlight and an omni light in the front viewport. Place the omni light above and slightly in from of the table. Place the spotlight above, in front and to the left of the table:
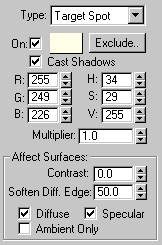
For light settings, use the default Multiplier setting of 1.0 and give the lights a pale yellow color. Enable Cast Shadows for the spotlight:
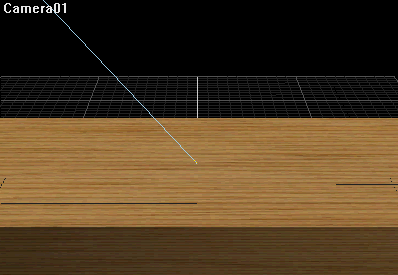
Your camera view should now look like this:
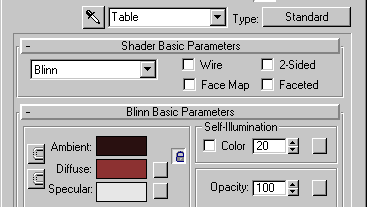
Next, open the Material Editor and select a material sample. Name the material Table and set the Self-Illumination to 20:
In the Blinn
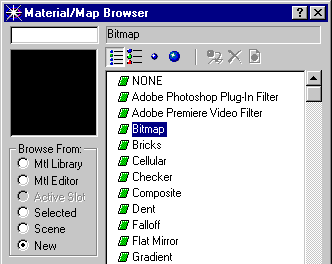
Basic Parameters rollout, click the Diffuse map button.
From the MAX3\Maps folder, choose wood. Then open Tutash.jpg:
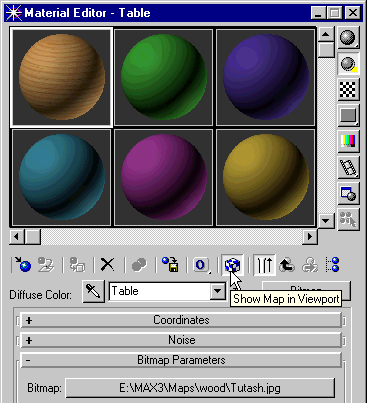
The Tutash.jpg map now colors the Table material. Name the map Table and click the Show Map in Viewport button:
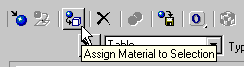
With the table material still active, select the table from the scene. Then click Assign Material to Selection:
The
table material now affects the table in the scene:
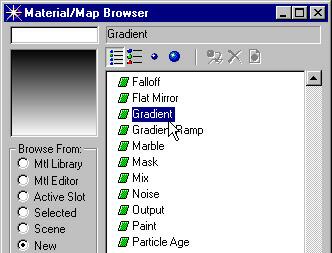
Painting the Background In
the Material Editor, click the next sample slot to the right. At the bottom
left of the palette of samples,
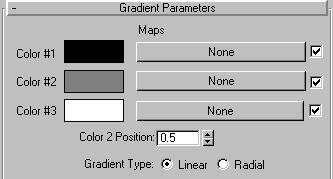
The Material/Map Browser closes and the gray gradient fills the sample slot in the Material Editor. The gradient parameters appear below.
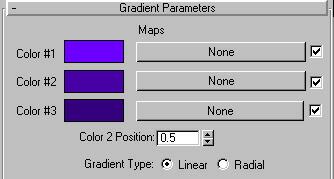
Next,
adjust the colors of the gradient:
Click the black swatch. In the Color Selector dialog box enter R=108,
G=0, B= 255. Then name the map Purple Gradient.
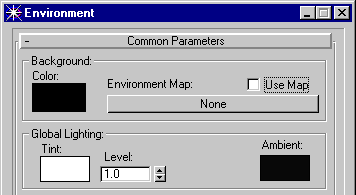
Choose Rendering > Environment. The Environment dialog box opens:
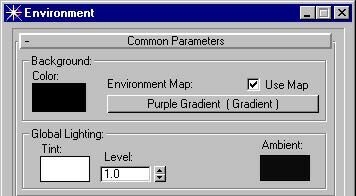
Drag the Purple Gradient from the Material Editor to the Environment Map button. When prompted, choose Instance rather than Copy so that any future adjustments to the gradient will update automatically:
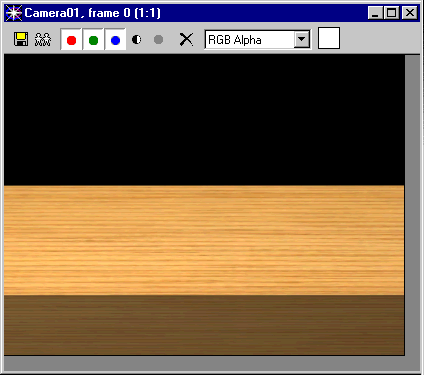
Close the Environment dialog box and render the scene:
Save your scene. The stage is set. Next, you will create the flasks and beaker. |
© 2000 Michele Matossian