|
Modeling Molecules Start
Overview Modeling Molecules Animating the Reaction Setting the Stage Making Glass Mixing Chemicals Animating the Camera Animating Precipitation Putting It All Together 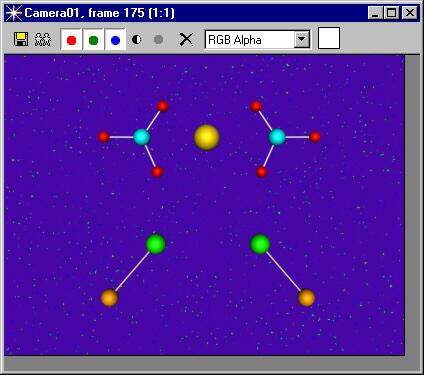
|
|
Modeling Molecules Start
Overview Modeling Molecules Animating the Reaction Setting the Stage Making Glass Mixing Chemicals Animating the Camera Animating Precipitation Putting It All Together
|
|
In this lesson, students create simple molecules such as water, potassium iodide and lead nitrate, and show how they interact in a double displacement reaction. We'll begin by creating a background for the chemical reaction. Creating the Background Choose File > Reset. Then save the new scene as Molecules.max. Open the Material Editor. The keyboard shortcut is M. The first sample slot is named Material #1. Highlight this name and replace it with Background:
Click the Get Material button, just below the sample slot palette:
In
the Material/Map Browser, scroll down to the maps. (Maps are preceded
by green parallelograms.)
The Noise map fills the Background sample slot:
Set the Noise Parameters as follows: Size = .5, Hight = 0.7, Low = 0.68
Double click on the Background sample slot. A window appears. Expand it by dragging on one of the corners. You should see what looks like stars in the sky:
In
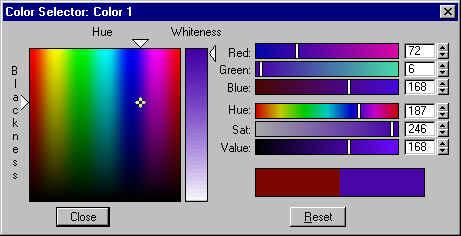
the Noise Parameter rollout, double-click on the black color swatch
next to Color #1.
Close the dialog box. The swatch next to Color #1 turns purple. Next, click on the button marked None next to Color #2:
In the Material/Map Browser, scroll down to the maps. Then double-click Gradient Ramp.
In the
Gradient Ramp Parameters, double-click on the left-most "flag"
that appears under the red end of the spectrum.
Next, choose Rendering > Environment to open the Environment dialog box. Drag the Background sample slot to the Environment map button:
Make sure that Instance is selected when you copy the map. This causes any adjustments you might make in the Material Editor to automatically update in the Environment Map:
The name of the map now appears on the Environment map button:
Click Render to see how the environment background looks. Note: Background maps only render from perspective views, such as the Perspective view or a camera view.
Close all open windows and save the file. Modeling the Molecules In the Top viewport, right-click on the viewport label and choose Smooth + Highlight:
In the Create command panel, click Sphere. Then create a small sphere with Radius = 30 and position it at the origin (0,0,0). The best way to do this is in the Keyboard Entry rollout, but you can also drag out a sphere and adjust it:
Name the sphere H for hydrogen and then click the color swatch: In the Object Color dialog box, select the AutoCAD ACI palette:
Then choose the bright blue color swatch at the bottom:
Click OK. The hydrogen molecule turns blue. Next, create an oxygen molecule just to the left of the oxygen molecule. Use the keyboard entry method and set X = -125, Y = 0, Z = 0 and Radius = :
In the Main Toolbar, set the Reference Coordinate System to World and set the pivot point center to Use Transform Coordinate Center:
In the Clone Options dialog box, name the copy O and click OK:
In the Create command panel, select Line. Then move the cursor over the oxygen molecule until it snaps to the pivot point. You will know this because a blue box will surround the red sphere:
Click the sphere and release the mouse button. Then move the cursor over the hydrogen molecule. When the pivot snap icon appears, left-click the mouse and then right-click to end line creation:
Using the Rotate tool, shift-clone the line so that the clone connects the hydrogen moleule to the second oxygen molecule: Set the color of both lines to white and name them both Bond. In the Line creation General rollout, check Renderable and set the Thickness to 6.0: Select all the objects in the scene. From the Group menu, choose Group. Name the group H20: Render the scene from the top view in order to see the thickness of the bonds:
Using the Move tool, shift-clone seven more molecules and position them around the origin. Using the Rotate tool, rotate the molecules at random :
In the Create panel, click the Cameras button. Create a Free camera in the center of the top view:
Activate the perspective view and then type C to change it to the camera view. In the camera viewport controls, click the Dolly Camera button. Dolly the camera back by dragging down in the camera viewport until all the molecules are visible:
Select all the molecules in the scene. Group them in a group that you name Water Molecules:
In the Display command panel, hide the group by clicking Hide Selected. Then hide the camera by checking Cameras in the Hide by Category rollout:
Using the same method as above, create a new molecule and name it NO3. NO3 is comprised of 3 oxygen molecules 120° apart surrounding a nitrogen molecule:
In the toolbar, right-click on the Move tool. In the Move Transform Type-In dialog box, enter X = -250:
A duplicate NO3 molecule mirrors the first on either side of the Y-axis:
Create a sphere using keyboard entry. Set the radius of the sphere to 45:
Name the sphere Pb (for lead) and assign the molecule a warm yellow color. Render the completed Pb(NO3)2 molecule:
In the top view, pan the scene upwards so that you have room to work below the Pb(NO3)2 molecule:
In the lower
left quadrant of the top view, create a a green sphere named K (for potassium)
with Radius = 35. Create a
line between the two spheres to represent the bond as you did before.
In the Display panel, click Unhide All. Examine the layout of the molecules in the camera view. You will probably want to make a few adjustments to the position of the molecules or the camera. When you have something you like, render the scene:
Save your scene. Congratulations!
Now you are ready to animate the reaction. |
© 2000 Michele Matossian