|
Mixing Chemicals Start
Overview Modeling Molecules Animating the Reaction Setting the Stage Making Glass Mixing Chemicals Animating the Camera Animating Precipitation Putting It All Together 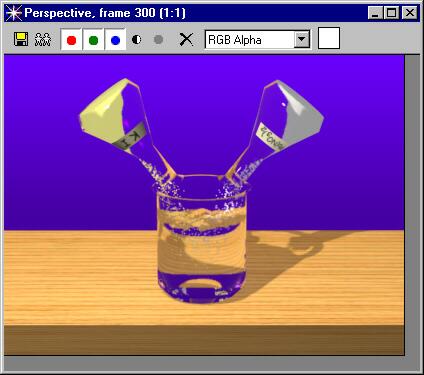
|
|
Mixing Chemicals Start
Overview Modeling Molecules Animating the Reaction Setting the Stage Making Glass Mixing Chemicals Animating the Camera Animating Precipitation Putting It All Together
|
|
In this lesson, you will model the chemicals and animate them pouring from the flasks into the beaker. Then you will agitate the surface of the as the powdered chemicals hit the surface. Animating the Flasks Open Glass.max and resave it as Mix.max.
Make a path for the KI Flask to follow as it pours. Use a Line with two Bezier corner points. Start the line in the middle of the flask at its pivot point. Place the other endpoint of the line above the left edge of the beaker. Name the line Path01:
Open the Modify panel and adjust the Bezier points so that they look like this:
Select
the flask and open the Motion panel. In the Assign Controller rollout,
highlight the Position controller.
In
the Path Parameters rollout, click the Pick Path button and then click
Path01 in the viewport.
Drag the time slider all the way to the right. The flask automatically follows the path:
Change views to the camera view. Then change the viewport resolution to Smooth + Highlights. Play the animation. If the label is facing away from the camera, rotate the flask along its local Z-axis until you can see it. Play the animation again. The flask may "jump" a little in rotation, just as if someone were picking it up. If it jumps a lot, turn on the Animate button and set a few keyframes to correct it. In the trackbar, drag the key at frame 300 to frame 175. Now the flask only pours between frames 0 and 175.
Unhide the Pb(NO3)2 flask. Create a path for this flask that mirrors the first one. You can use the Mirror command with the copy function enabled, or simply draw a another line. Name the line Path02. Following the same procedure as above, assign a path controller to the flask and pick Path02 as the path. Don't forget to check Follow and to select the Z-axis. When you are done, you should have two flasks that animate together:
Pouring the Chemicals Next,
we will create the illusion of powdered chemicals pouring out of the
beakers.
In the top view, create a cylinder centered in the flask:
Name
the cylinder "KI Powder" and link it to the flask. Then apply
an Edit Mesh modifier.
Select the top two rows of vertices and apply a 4x4x4 FFD modifier to them:
Click the FFD Sub-Object button. Turn on the Animate button and drag the time slider to frame 175. A selection box appears around the flask indicating that you have reached a keyframe. Sculpt the cylinder into a curved, tapering slope by selecting, moving, and non-uniform scaling rows of control verticies sothat the KI powder looks like it is pouring:
Play back the animation in the camera view to see the timing of the powder pouring. Make any adjustments that seem necessary. Next,
unhide the beaker and move the time slider to frame 138. Choose Create
> Space Warps > Particles & Dynamics and select Gravity. In
the top view, drag a gravity icon of any size in the center of the beaker:
In the Create > Geometry panel, choose Particle Systems from the drop-down menu and select Snow. In the right view, create a small snow particle emitter by dragging a short distance along the bottom edge of the KI powder:
Move the emitter to the leading edge of the KI powder and rotate it so that the particles shoot more or less out of the top of the flask. Then link the emitter to the KI powder object and bind it to the gravity space warp:
Advance the time slider past frame 175 so that the flask comes to rest at the edge of the beaker. Adjust the position and rotation of the emitter and the strength of the gravity binding so that the particles stay within the bounds of the neck of the flask:
Select the snow particles. In the modifier stack, adjust the base parameters of the snow particles to match these settings:
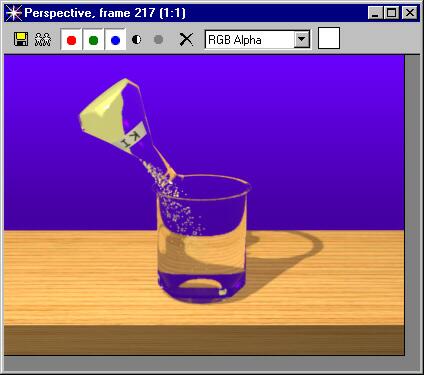
The result will look like the particles are flowing freely from the flask and dissolving in the beaker starting at frame 160:
In the Material Editor, create a pale yellow material with strong self-illumination:
Name the material KI powder and apply it to the particles. Change views to the perspective view and click Zoom Extents All. Unhide the table and render any frame in the scene after frame 175:
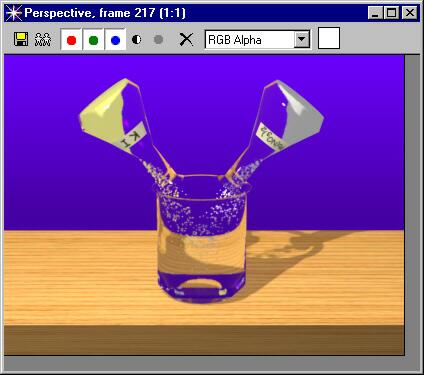
Repeat the steps for creating the animation path, the KI powder and the KI particles for the Pb(NO3)2 flask. Some elements, such as the animation path, can be easily mirrored and moved. Others, such as the particles, may be easier to create and align from scratch. Note that grouping and mirroring disrupts the flow of the particles, so it is better to mirror/copy elements one at a time. The result should look like this:
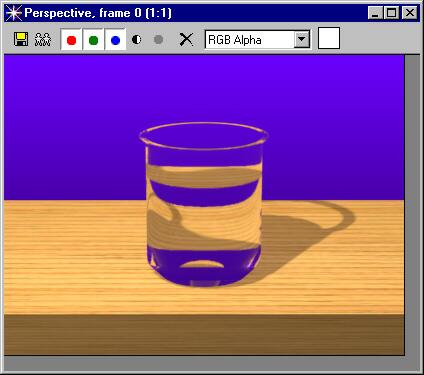
Next, we will create the illusion of water in the beaker. Start by hiding everything in the scene except for the beaker and the table. Select the beaker in the top view and click Zoom Extents Selected. Then create a cylinder centered inside the beaker that has the same radius as the the beaker, and about two thirds of its height:
Set
the number of sides to 24 and cap segments to 8. Convert the cylinder
to an editable mesh.
In
the Material Editor, copy the beaker material to a new sample slot and
rename it Water.
Animating the Water Unhide
the flasks, the powdered chemicals, and the particle systems. Drag
the time slider all the way to the right. Set the Noise parameters to
the settings you see in the first screen shot below left.
In the track bar, select the key at frame 0. Right-click on the key and select Water: Phase. Change the Out tangent to Step. Close the dialog box and the right-click on the key a second time. This time choose Water: Strength. Reset the tangent to Step and close the dialog box:
Drag
the time slider back to frame 175, or wherever the particles first touch
the surface of the water.
You should now have 3 keys: one at frame 0 with Out tangents set to Step, one at frame 300 with settings that produce surface noise on the water, and one at frame 175 with identical noise settings except that the phase is set to 0. When you play back the animation, the water should be still until frame 175 when the particles enter the water and the surface erupts with noise:
Unhide
All and
Save your scene. Congratulations! You have now completed the modeling, mapping and animation of all the objects that appear in the view. Next, we will animate the camera and render a movie.
|
© 2000 Michele Matossian